How to Avoid Noise in Your Images (Without Destroying the Details)
Here's the simple truth: most noise problems don't come from your camera.
Quick takeaways
- Expose the file well in camera; heavy shadow recovery is where noise usually becomes most visible.
- For moving horses, protect the shutter speed first and accept a moderate ISO increase when the light requires it.
- Use masked noise reduction so coat texture, eyes, tack, and rider details do not turn soft or plastic.
- Judge noise at the final export size before smoothing away detail that the viewer would never notice.
Noise Reduction Without Ruining Detail | DaVinci Resolve (Temporal & Spatial)
DaVinci Resolve noise reduction can save a shot - or ruin it with ghosting, waxy skin and a plastic look when you're trying to fix ...
Also useful if you are comparing clips around: how to avoid noise in your images without destroying the details
- Channel: Shot by Reality
Expose for the horse and the shadow detail before you touch the edit sliders
Noise usually becomes obvious when a dark file is brightened later. In an arena, barn aisle, shaded paddock, or evening portrait session, protect the important shadow detail by watching the histogram and checking the horse's coat, rider clothing, and background before moving on.
It is often cleaner to raise ISO a little in camera than to underexpose badly and rescue the file afterward. A correctly exposed ISO 1600 image can hold more usable detail than an ISO 400 frame that has to be pushed two or three stops in editing.
For dark horses, backlit scenes, and indoor events, take a quick test frame and zoom in on the coat texture. If the blacks already look blocked up, add light, open the aperture, slow the shutter only if motion allows, or change your angle before the action starts.
- Check the histogram and highlight warnings after the first test frame, not after the whole ride or portrait set is finished.
- Expose for the horse's usable coat detail instead of letting a bright sky or pale arena wall fool the meter.
- Use exposure compensation, manual exposure, or a small lighting adjustment when the subject is darker than the background.
- Avoid the plan of 'I'll fix it later' when the file is already underexposed in the shadows.
Good horse photography almost always gets easier when the plan gets simpler.
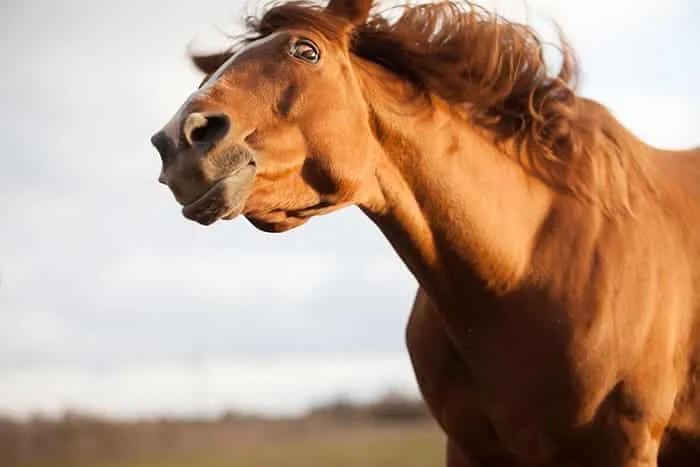
Balance shutter speed, aperture, and ISO around the kind of movement in front of you
A quiet portrait and a canter stride do not need the same settings. If the horse is standing, you may be able to use a wider aperture and a moderate shutter speed; if the horse is jumping, turning barrels, or trotting toward you, shutter speed has to come first.
Do not lower ISO so far that the shutter speed drops below what the movement needs. Motion blur and heavy shadow recovery are usually harder to save than a little clean grain captured at the right exposure.
When light is limited, decide which detail matters most: frozen legs, readable eyes, clean coat texture, or background separation. That choice keeps the settings practical instead of chasing a perfectly low ISO that does not fit the scene.
- For fast arena action, protect shutter speed before worrying about a slightly higher ISO.
- For portraits, use the widest aperture that still keeps the horse's face, eyes, or rider connection sharp enough.
- If the background is busy, move position or change focal length before relying on heavy editing to hide noise.
- Review a few frames at full size during breaks so you catch exposure problems while you can still reshoot.
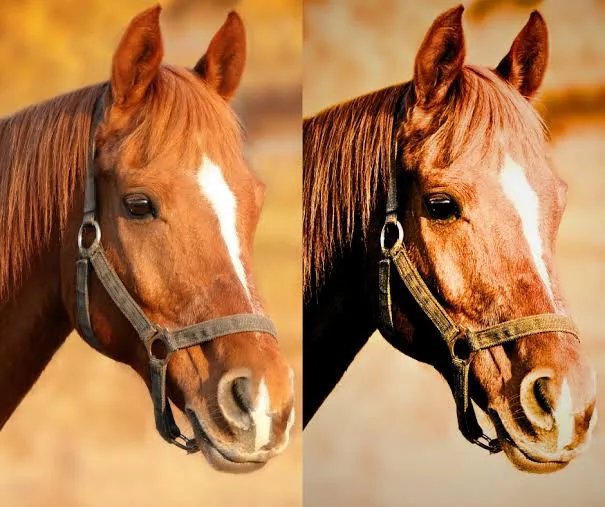
Use noise reduction only where the file actually needs it
Global noise reduction can make a horse's coat, mane, leather tack, and arena footing look plastic. Apply it carefully, then compare the eye, muzzle, saddle detail, and hair texture before accepting the edit.
Masking is safer than treating the whole image the same way. Smooth a dark background, deep shadow, or out-of-focus corner more than the horse's face, bridle, rider's hands, or any texture that gives the photo life.
Sharpening and denoising should be checked together. If sharpening makes grain in the shadows sparkle, reduce the sharpening amount, limit it with a mask, or sharpen only the subject areas that need crisp edges.
- Start with a light luminance-noise setting and increase it only until the distraction settles down.
- Mask the background separately from the horse when the subject detail is already clean enough.
- Check coat hair, eyes, reins, and saddle stitching before exporting, because those details show over-smoothing quickly.
- Keep a before-and-after view open so noise reduction does not quietly remove the character of the image.
Judge the file at the size where it will actually be used
A photo that looks noisy at 200 percent may be perfectly fine for a web gallery, social post, proofing album, or small print. Before you overcorrect it, view the image at normal screen size and at the final crop ratio.
Large prints, commercial licensing, and contest submissions need a stricter check. Look at the subject's face, the transition from shadow to highlight, and any large plain background areas where grain becomes obvious.
If the image is going to a contest or publication, keep the edit conservative and review the rules before using AI-based denoise tools. Some competitions and editorial uses may limit how much automated processing is acceptable.
- Check the export size, crop, and intended use before deciding how much noise is truly a problem.
- Make a test export and view it outside the editing program, because full-resolution previews can make minor grain feel worse than it is.
- Be stricter with files intended for large prints, client wall art, magazines, or juried submissions.
- Save a clean master edit so you can make a softer web version and a more detailed print version if needed.
Create cleaner files on the next shoot with steadier light and support
The best noise reduction starts before the edit. Choose angles with steadier light, avoid deep shade beside bright backgrounds when possible, and use the part of the arena or pasture where the horse's coat still has shape and separation.
Support also matters. A monopod, steadier hand position, good stance, or planned shooting lane can let you keep the frame sharp without forcing extreme edits later. For portraits, a reflector or a small amount of fill light can protect shadow detail in the face and neck.
If you regularly photograph indoor shows, dim barns, or evening sessions, learn your camera's comfortable ISO range and build presets around those files. Knowing that limit ahead of time makes your capture choices faster and less stressful.
- Scout the light before the horse enters the scene and mark the cleanest angles for action or portraits.
- Use support when it helps you keep framing steady without sacrificing the shutter speed needed for movement.
- Add safe fill light for portraits when the face is falling into deep shadow.
- Test your camera at common ISO settings so you know how much grain is acceptable for your clients and print sizes.
Decide when grain is acceptable and when the file needs a different approach
Not every bit of grain ruins an equine image. A quiet black-and-white portrait, a dusty rodeo frame, or a late-evening barn story can still feel strong with some texture if the horse, expression, and moment are clear.
The problem is not grain by itself; it is grain that hides the subject. If the eye loses catchlight, the coat turns muddy, or the background noise pulls attention away from the horse, the file needs a gentler edit or a different capture next time.
When a photo matters for a client delivery, keep your standard consistent. Deliver the cleanest usable version, but do not blur away the details that make the horse recognizable, athletic, and alive.
- Keep natural texture when it supports the mood and the subject remains readable.
- Reject or re-edit files where noise hides the eye, face, leg position, tack detail, or important brand elements.
- Use black-and-white conversion carefully; it can make texture feel intentional, but it will not fix a weak exposure by itself.
- Make notes after difficult sessions so the next shoot has better exposure, lighting, and backup settings.
Frequently asked questions
Is it better to use a higher ISO or brighten the photo later?
It is usually better to use a higher ISO and expose the horse properly than to underexpose the file and lift the shadows heavily later. Clean exposure protects coat texture, eyes, and background transitions.
Should noise reduction be applied to the whole horse photo?
No. Apply it selectively. Smooth noisy backgrounds and deep shadows more than the horse's face, mane, tack, and rider details, because those areas can look fake if they are over-smoothed.
How much noise is acceptable in an equine photo?
Some grain is fine when the horse's eye, expression, coat shape, and movement are still clear. It becomes a problem when it distracts from the subject or hides important detail in a client print or contest file.